
Fujifilm X Series: Understanding Still Menu Image Quality Setting (Post 3/3)
Mastering JPEG quality, film simulations, and Fujifilm’s signature color science

📖 The Image Quality Setting menu is one of the most comprehensive in the Fujifilm X Series — so rich, in fact, that it will be covered across three separate posts.
👉 This is Part 3 of 3, and it covers the following settings:
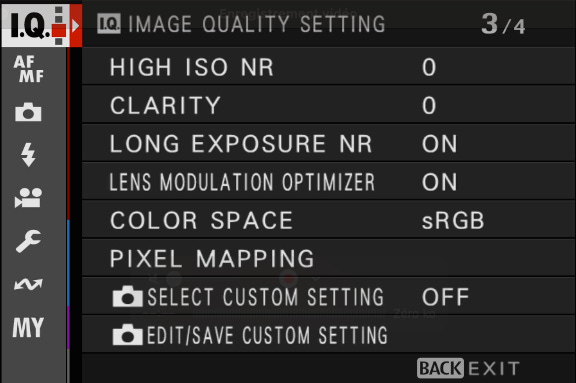
High ISO NR
Clarity
Long Exposure NR
Lens Modulation Optimizer
Color Space
Pixel Mapping
Select Custom Setting
Edit/Save Custom Setting
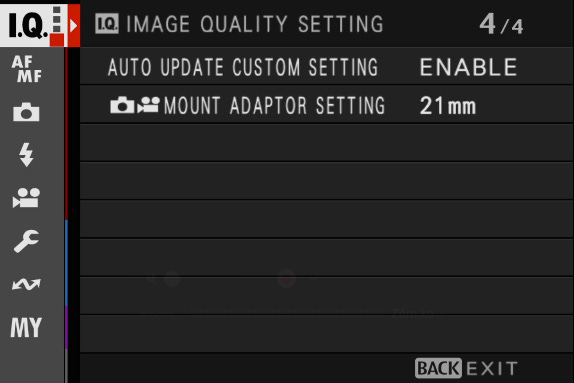
Auto Update Custom Setting
Mount Adaptor Setting
👉 Part 1 & 2 are already available here:
https://jmplisson.substack.com/p/fujifilm-x-series-understanding-still-menu-image-quality-setting-1-to-3
https://jmplisson.substack.com/p/fujifilm-x-series-understanding-still-menu-image-quality-setting-2-to-3

Menu overview
High ISO NR
📸 What it does
High ISO NR (Noise Reduction) reduces the appearance of digital noise in JPEG and HEIF images shot at high ISO values. When light levels drop and you increase ISO, luminance and chroma noise naturally become more visible. This setting tells the camera how aggressively it should smooth noise in the final image.
While noise reduction helps create cleaner photos, it can also soften fine details — so the key is finding the right balance for your subject and style.
📝 Note: High ISO NR only affects JPEG and HEIF output. RAW files are not altered, although the preview may show the effect.
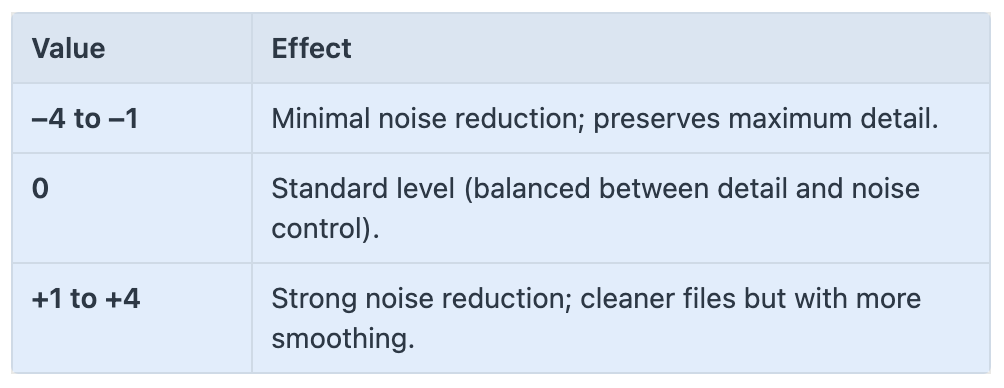
⚙️ Available options
🎯 When and why to use it
Use lower values (–4 to –1) when detail preservation matters — landscape, architecture, night street photography, or when you prefer a natural grain structure.
Use higher values (+1 to +4) when photographing in very low light, or when noise is more distracting than detail (e.g., casual snapshots, social media photos).
For portraits in low light, moderate NR can help smooth noise in skin tones.
Leave it low if you plan to process the image later — it’s better to apply NR during post-processing.
🛠 Recommended setting
0 is a safe default for most shooting situations.
–2 works well when you want a more natural, film-like texture with preserved details.
+1 is useful for low-light indoor scenes where noise becomes distracting.
Avoid +4 unless you really need aggressive smoothing (very dim environments).
💡 Tips
Combine lower High ISO NR values with Grain Effect for a more organic rendering in high-ISO night photos.
If you’re shooting RAW + JPEG, set NR lower so the JPEG keeps texture while the RAW stays clean for editing.
Be aware that strong noise reduction can blur fine edges and textures — zoom in in Live View to evaluate before shooting.
Night street shooters often prefer –2 or –4 for a natural, cinematic look.
Clarity
📸 What it does
Keep reading with a 7-day free trial
Subscribe to The Unofficial Fuji X Series User's Guide (EN) to keep reading this post and get 7 days of free access to the full post archives.